The API and I - Exposing a Plumber API
If you had asked me two years ago to use and API in my scripts, much less develop and deploy them, I probably would have hid under my desk. Well, I probably wouldn’t have actually hid, but I would have wanted to. Developing APIs can seem quite daunting at first, but I promise, it’s really not. If I can do it YOU definitely can!
I am going to show how to build an API, first and then expose it in less than 5 minutes, are you ready?!
First a little on APIs to get your head in the right place. 🤓
What is an API?
Application Programming Interface
In short, it allows a user to programatically pull data from a source given that source provides one
ex. The NYT, Twitter, Facebook, Google, US Census
How Does it Work?
- Think of it like this, just like a Graphical User Interface (GUI) allows you to interact with your code, an API lets your code interact with other code
- Set of commands, functions, objects, and protocols
- used to create software or interact with an external system (databases)
- everywhere!
- convenient- ready-made code to simplify the life of a programmer
Not Only for Getting Data
- Build APIs for your ML models so others can use them
- Write (post) to a database
- and update (put) and delete (delete)
- Functions
- more control over what is exposed to end user
Okay, enough of that, let’s build one shall we?? 😉
Lucky for us, plumber makes this step really easy! I’m not going to go into the weeds of the details. The documentation does a really good job at this, so why be redundant!? We’re here for the part after that!
FYI:
📦: plumber
📖: https://www.rplumber.io/
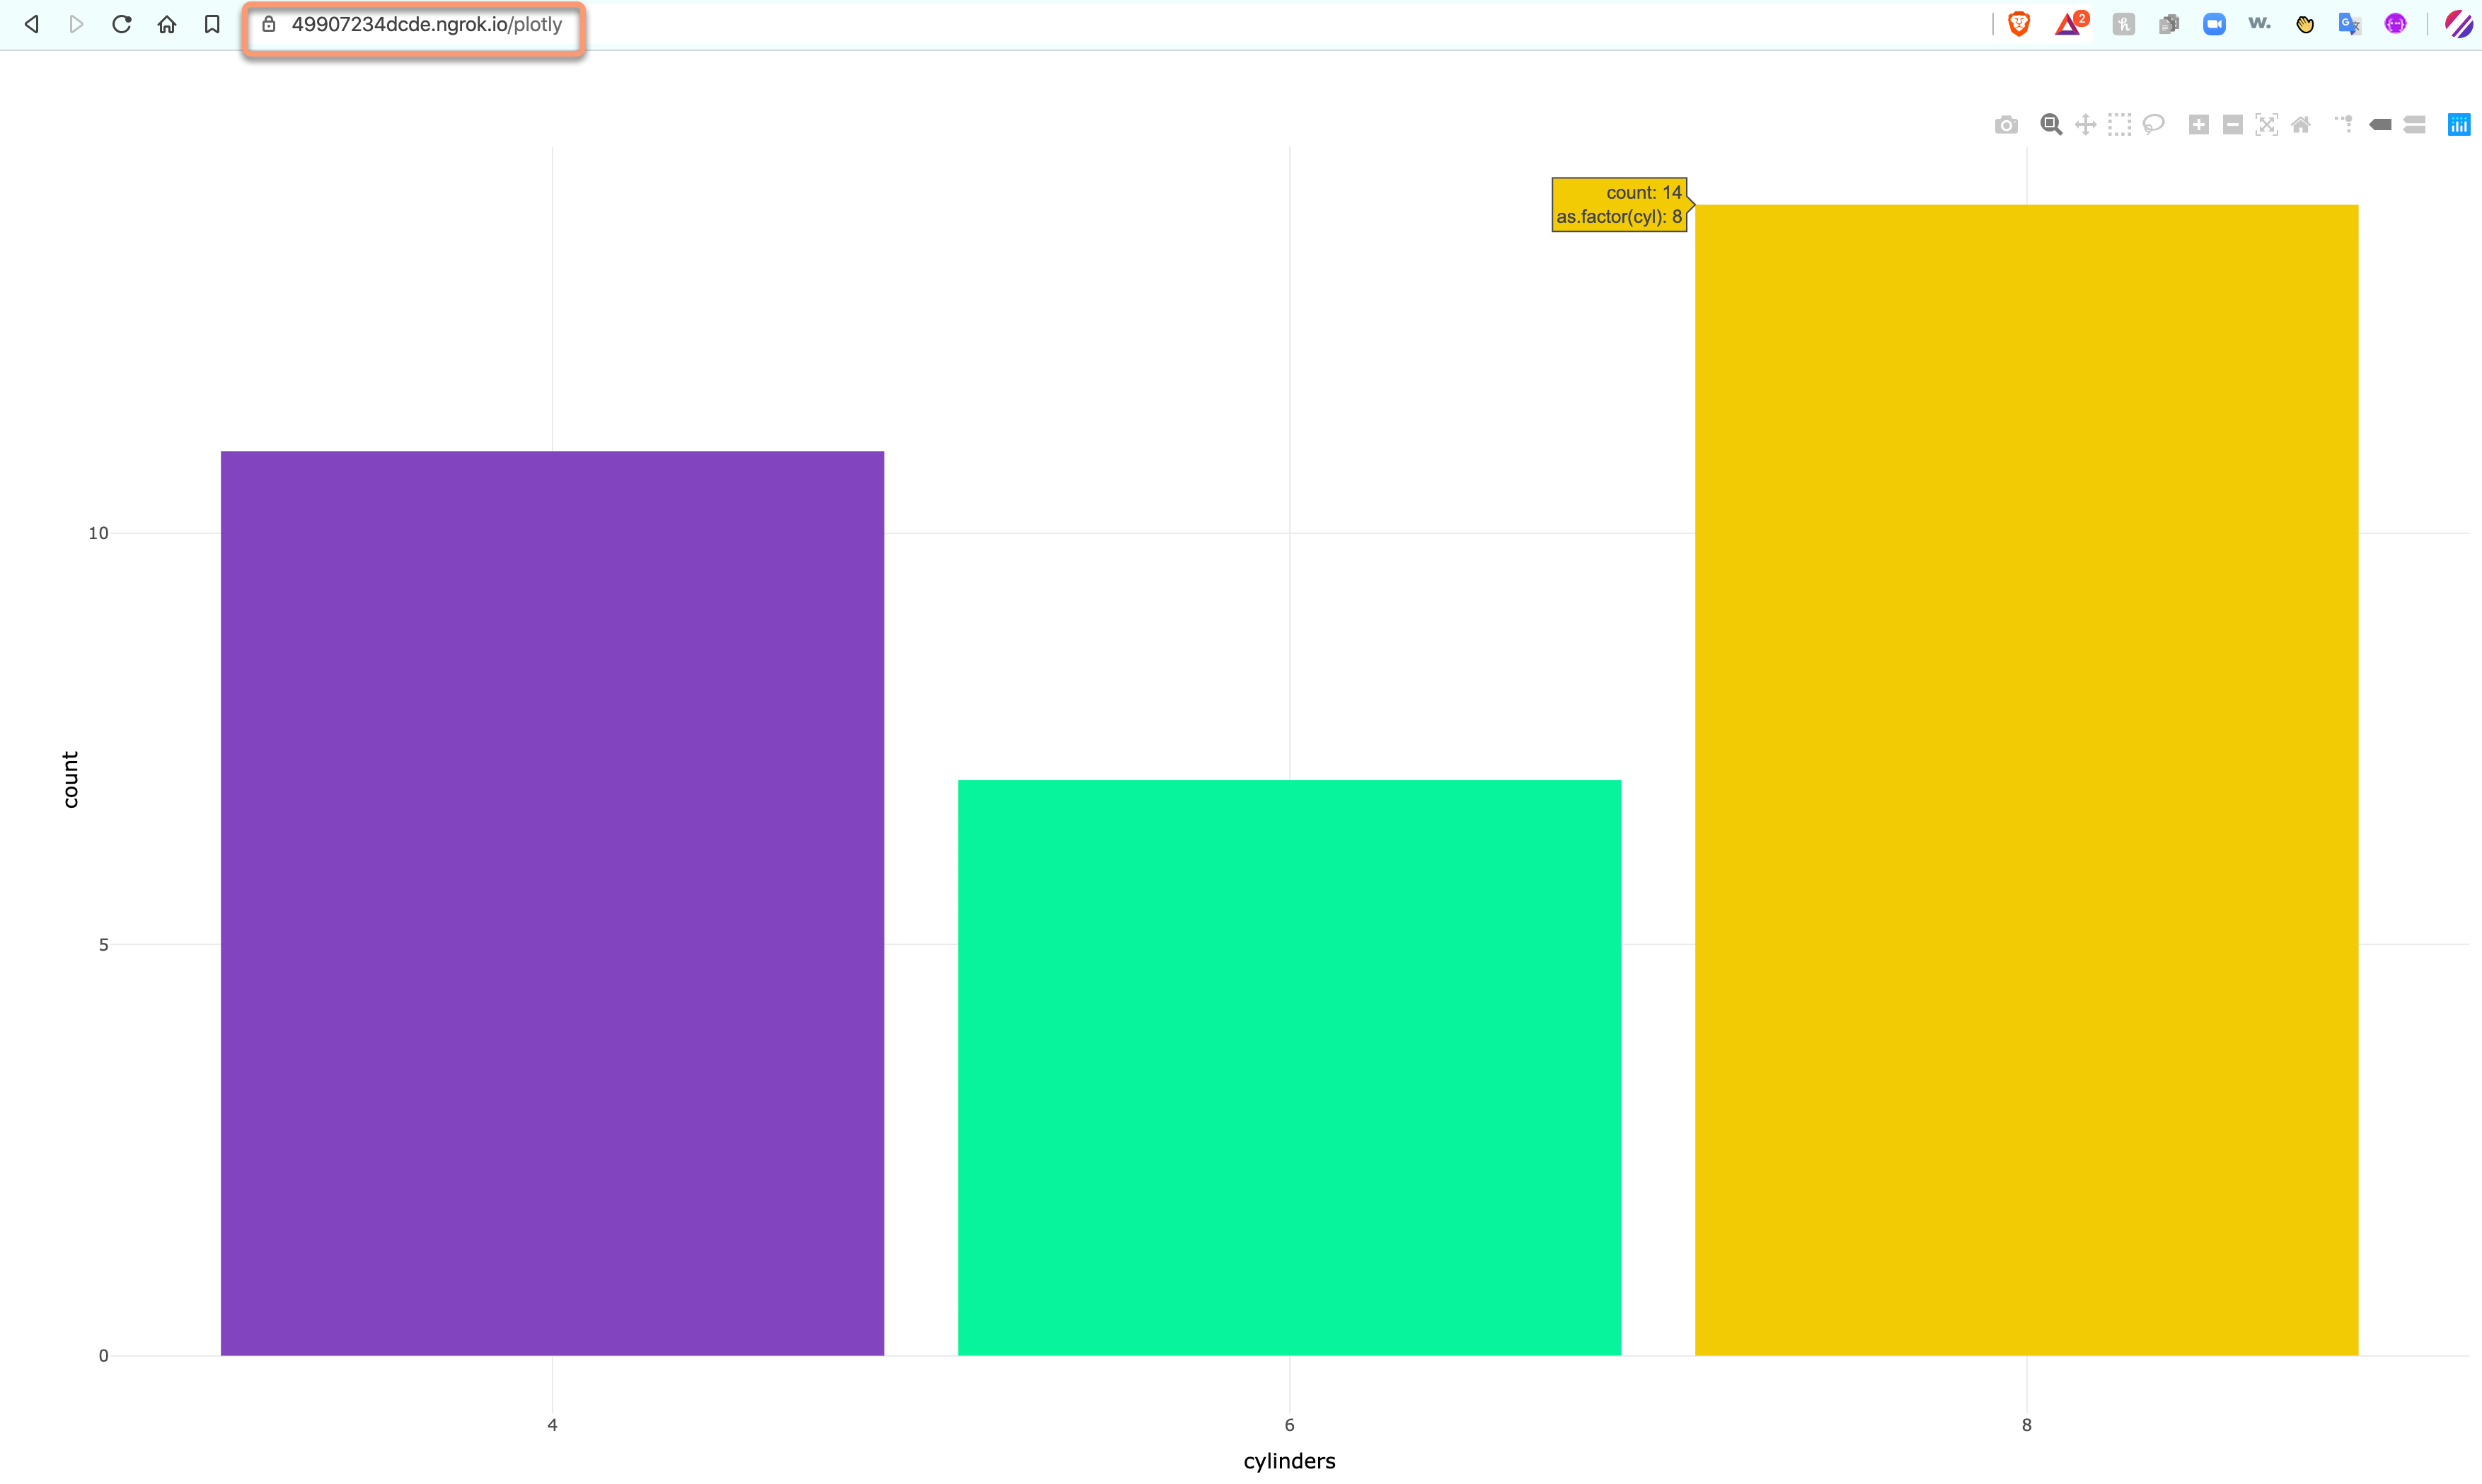
Here, we want to expose an API that returns a dynamic plot using ggplot2::ggplot() and plotly::ggplotly(), specifically we are plotting the distribution of our favorite mtcars$cyl data.
Wait, a couple steps back. Why are we exposing and not deploying? And what is exposing, anyways?
Good question, when you run a service such as an API or a Shiny app, for example, locally on your computer, you are running it as a server behind the scenes. You can access it through your browser by typing localhost:portNumber. Exposing your service is when we make this internal address (localhost) available on the internet. We are exposing whatever service on the particular port by giving it an external(public) URL.
Why would we do this? Well, if you are building models or various other objects meant for production, it would be a bit of a pain to constantly build and re-deploy, especially during the beginning stages when you are more prone to bugs. You could really piss off some engineers that way! Exposing your API is a good way to test before you deploy to your production server 😊
So, let’s get to it! Let’s start with our API:
library(ggplot2)
library(plotly)
#* Plot a dynamic histogram
#* @serializer htmlwidget
#* @get /plotly
function(){
  data(mtcars)
  x <- ggplot(mtcars, aes(x = as.factor(cyl))) +
    geom_bar(fill= c("#8245BF", "#05F29B", "#F2CB05")) +
    theme_minimal() +
    labs(x = "cylinders")

  ggplotly(x)
}
To run your API locally just save the above script somewhere you can find it and run the following two commands in the console:
library(plumber)
r <- plumb("plumber.R")
r$run(port = 8000) #this will run your api on localhost, port: 8000.
When you run this you will get a screen like this from swagger:
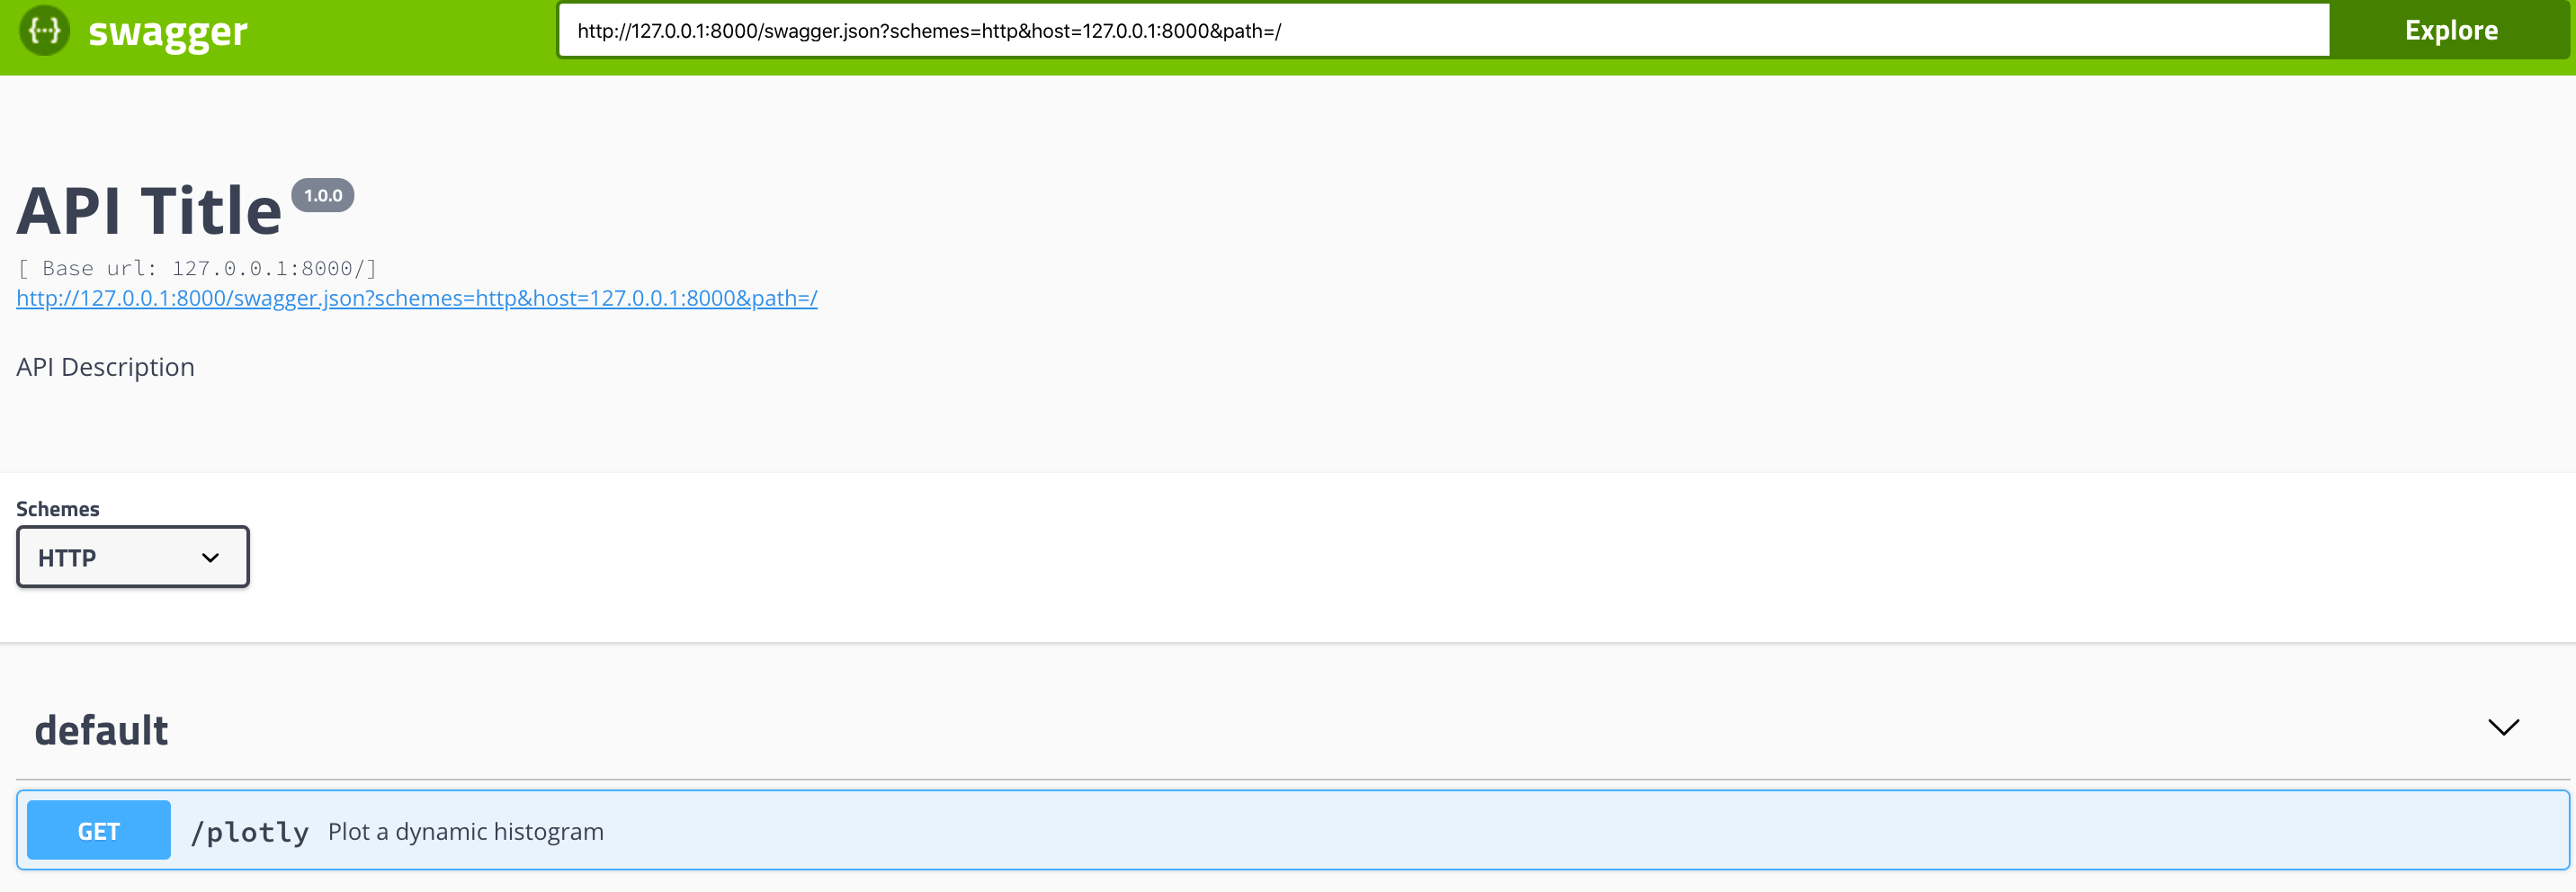
FYI, your local address will be localhost:8000/plotly
Now to the fun part!
For exposing our API, we will use a service called ngrok
- You will have to create an account, this is how you will get your authentication token. The easiest would to authenticate is with your GitHub account, if you have one.
- Download the installation for your operating system
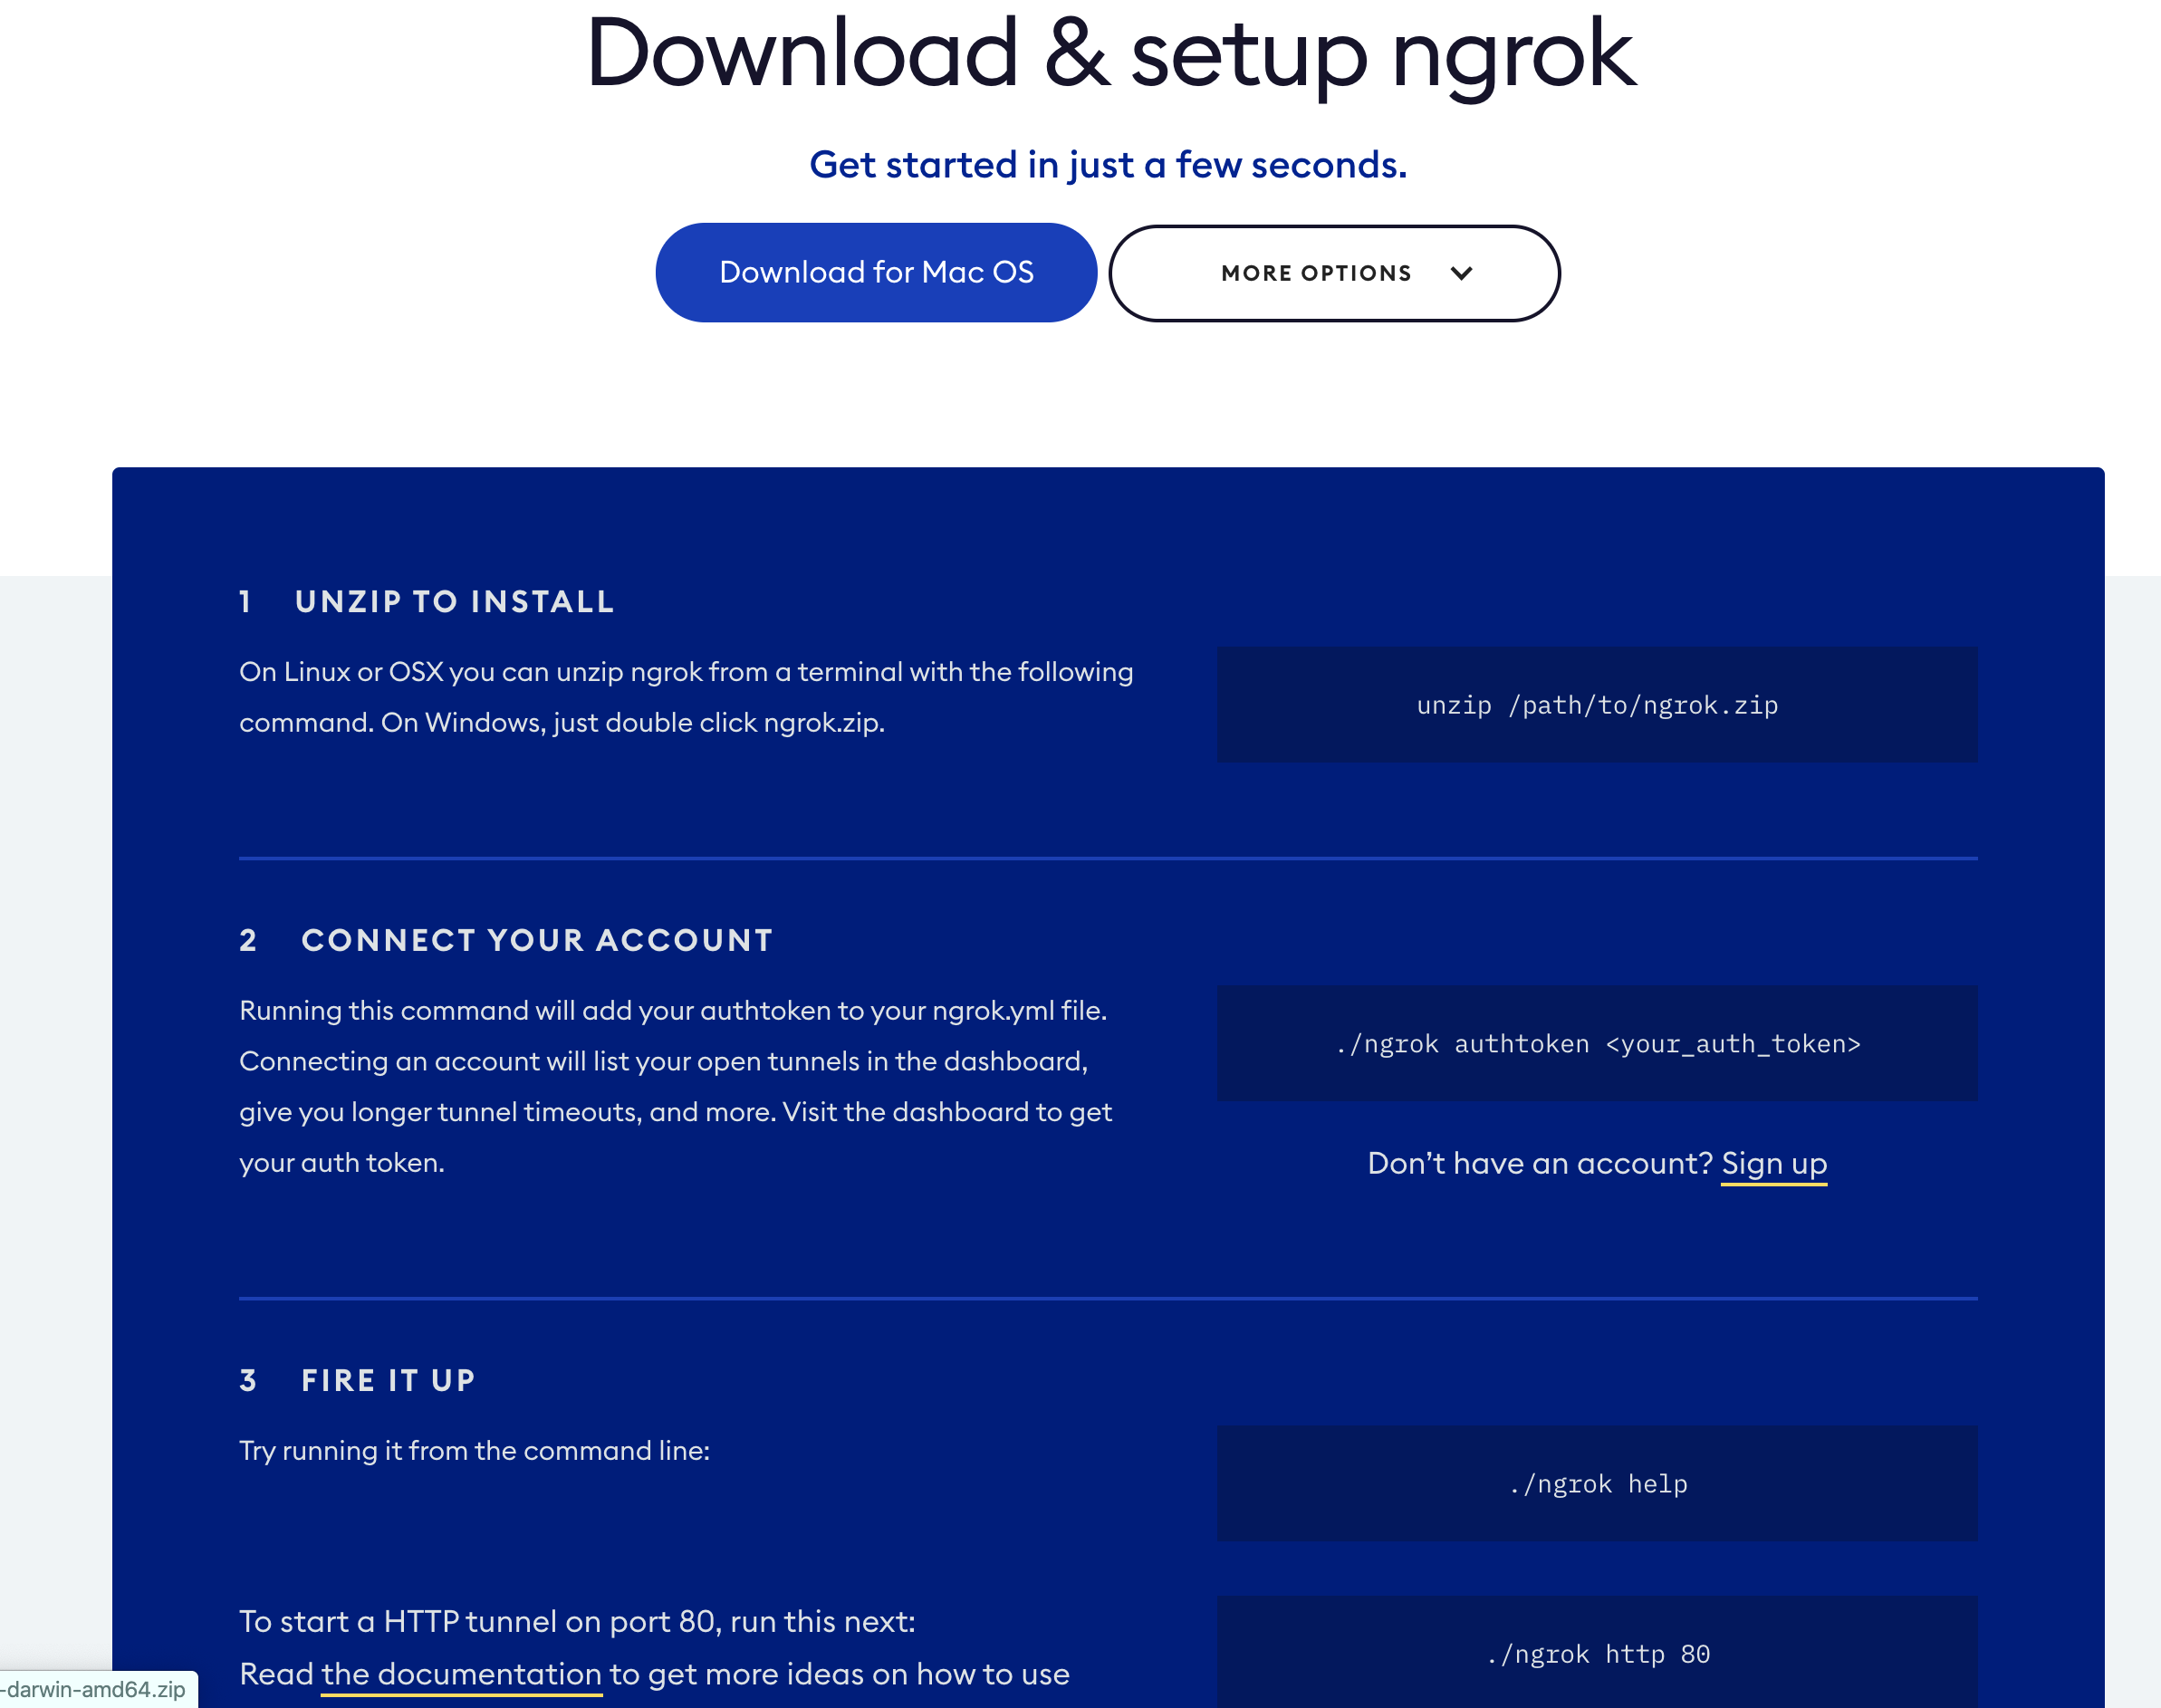
- Open your terminal
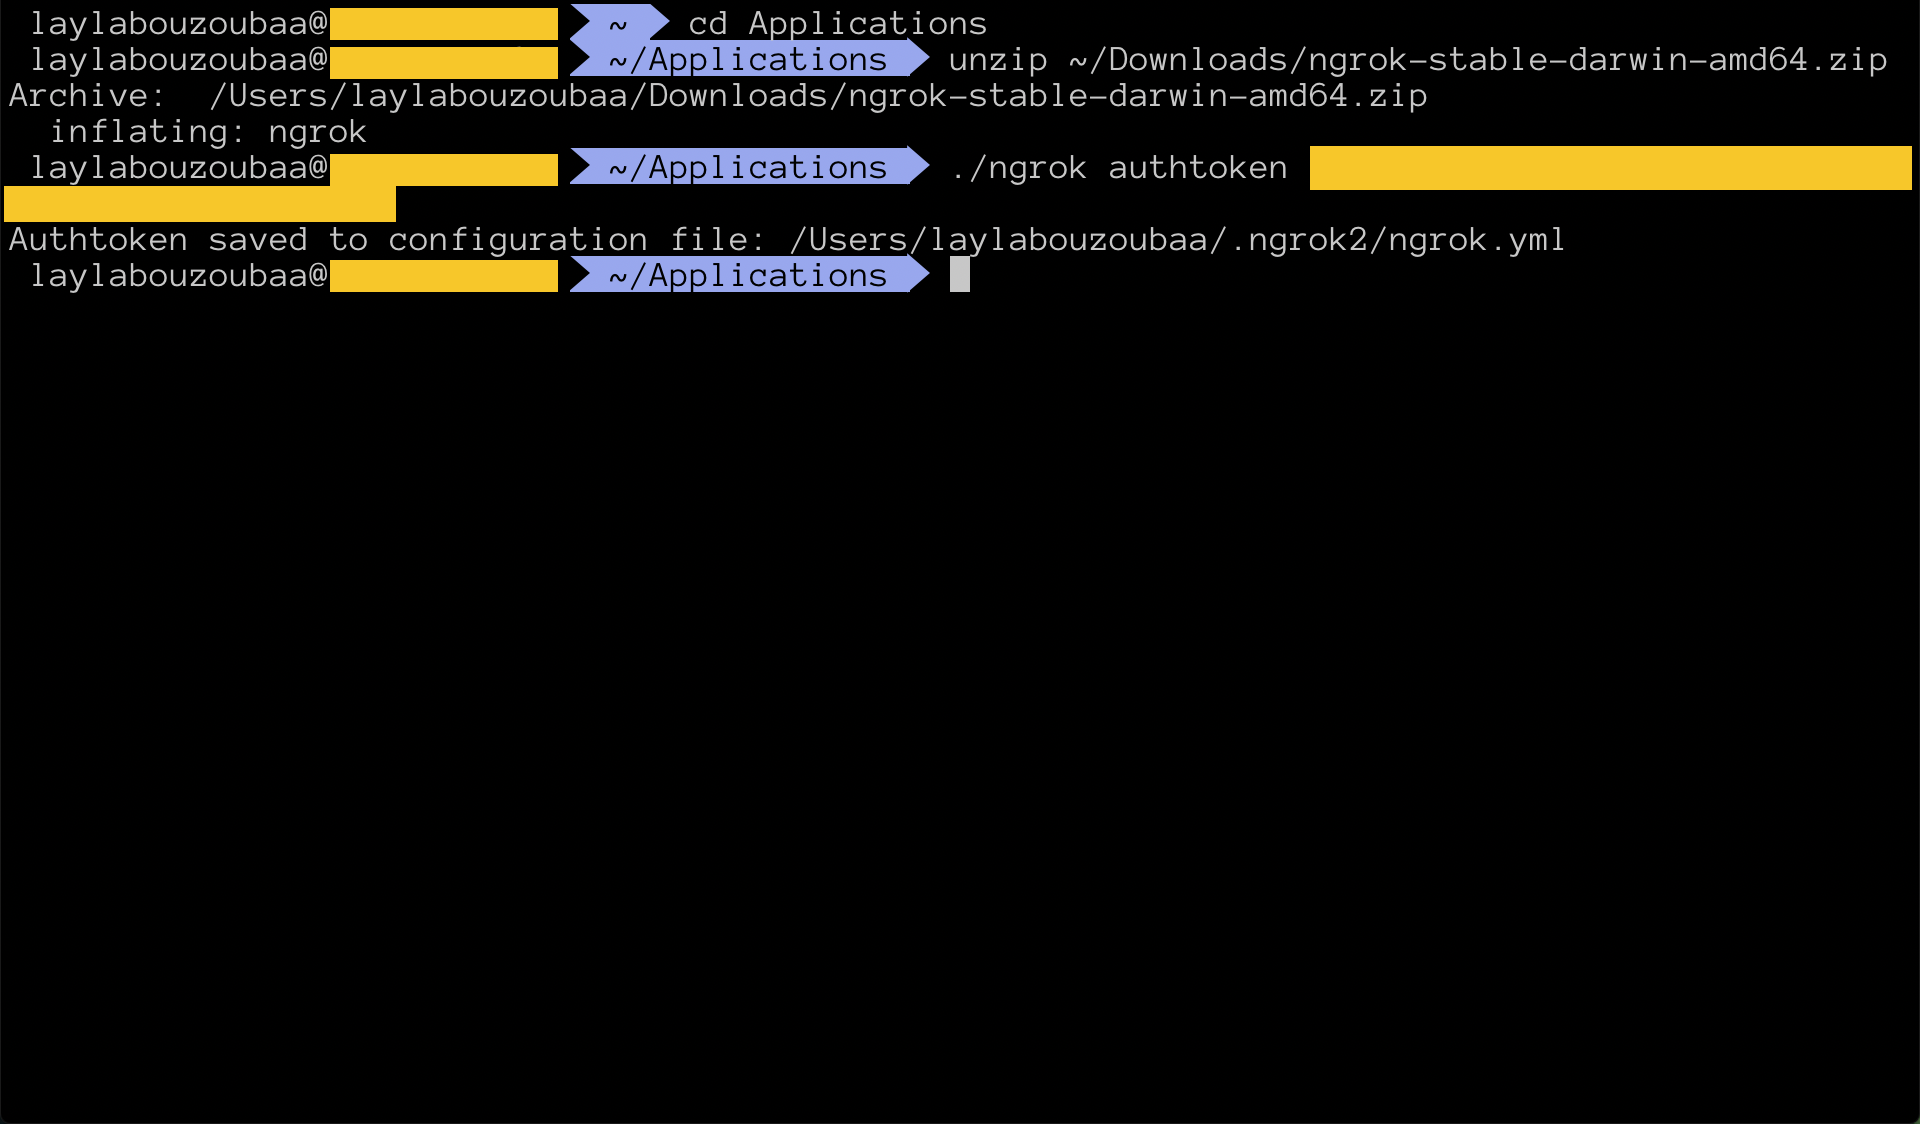
- Unzip the ngrok installation files
cdinto that directory and authenticate the application (see picture below)./ngrok authtoken YOUR-AUTH-TOKEN
Now it’s time to expose your API! 😎
- Hopefully, you still have the localhost served. If not, just run
r$run(port=8000)again and you should be good. - Open your terminal again. Make sure you’re in the directory where you unzipped ngrok (Applications, for me) and run
./ngrok http 8000and that’s it! You have now exposed port 8000 on your computer. If all went well, you should get a screen like this:
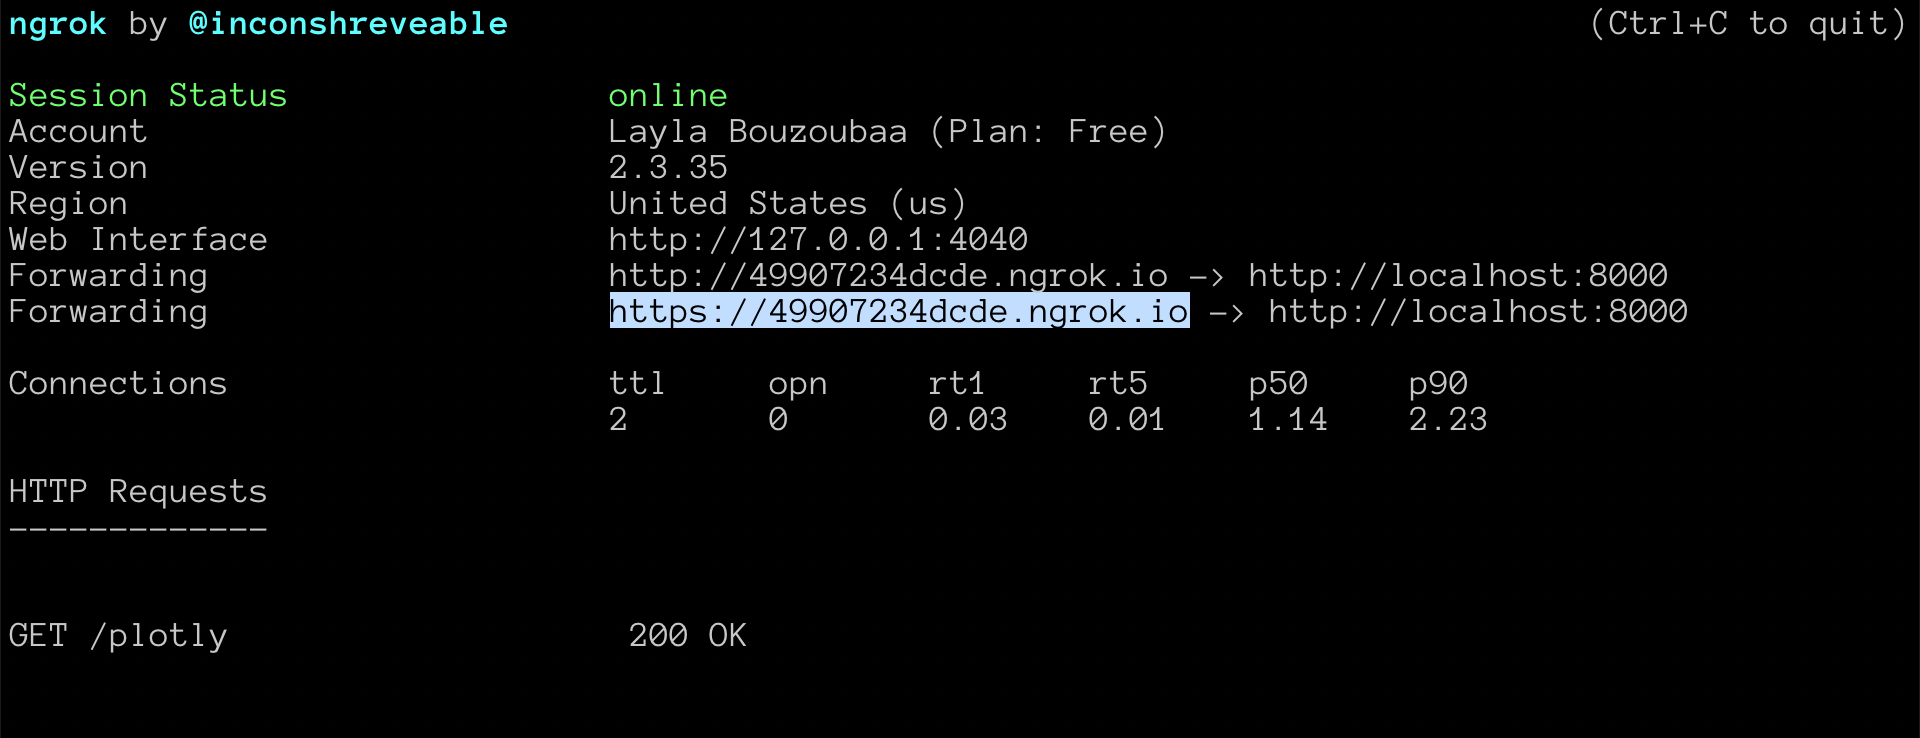
Now, all you have to do is share! Copy and paste the “Forwarding” URL and add the path to your API and send it out for testing!